End squareness – why is it important and what are the best ways to measure it?
What is end squareness?
End squareness – the extent to which a pipe’s end is perpendicular and parallel – is one of the more minor aspects of pipe geometry. As pipe experts with hundreds of thousands of measurements under our belts, we know that no pipe’s geometry is ever perfect. Just as no pipe is ever truly round, or straight, no end is ever truly square. Although pipe end squareness may be a minor issue, pipeline integrity depends on getting all the small things right. Read on to learn more why end squareness matters and how we can measure it effectively.
Why measure end squareness?
Pipes with out-of-square ends cause problems in the fabrication of a pipeline. Welding pipes that are out-of-square can cause joints to be out-of-straight, affecting the pipeline’s overall integrity. If out-of-square pipes are welded they can create problems later in the pipe-lay process – some welds will need to be cut out, leading to costly delays, or, if the poor weld goes unnoticed and the pipeline is laid, it will be less fatigue-resistant and will have a shorter lifespan.
Measuring end squareness ensures that pipes are within the required specification. It helps operators achieve better pipe fit-up, which in turn leads to higher quality welding, fewer delays and cut-outs, reduced costs and improved pipeline integrity.
What causes out-of-squareness?
The pipe fabrication process results in pipes that are never perfectly straight. During fabrication pipes are bowed and bent along their bodies and their ends are hooked. When pipes are cut, usually into 12m lengths, the various cutting, end-facing and bevelling methods will affect their end squareness. When building a pipeline, the relationship between pipe straightness, squareness and all the other aspects of pipe geometry requires careful management to achieve best results.
Measurement methods
Squares, gauges and wedges
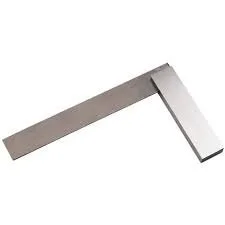
Traditional measurement devices include squares (framing, combination and engineers’), rulers, gauges and Go/No Go wedges.
Squares are used comprehensively throughout the construction and engineering industries and in some circumstances can be very effective. Precision engineers’ squares, for example, are made from high-grade steel, with a tempered, hardened and damage-resistant blade. Rulers, feeler gauges and Go/No Go wedges are also widely used.
These methods come with considerable disadvantages. They all depend on a high degree of human operator skill and require interpretation of results that can lead to errors. When measuring pipes with larger diameters, these tools can become extremely difficult to handle in the correct orientation to the pipe, and obtaining accurate results is increasingly hard. If the “stock” of a square is not held properly in contact with the pipe wall and exactly parallel to its axis, both across and along the pipe, measurement errors become more and more significant. Furthermore, these methods only detect squareness relative to a short section of pipe.
Squares with integrated gauges
Squares with integrated digital dial gauges are easier to use, less prone to operator judgment errors and more reliable. They use a calibrated micrometre to measure end squareness directly, can be set and checked in the field using a calibrated laboratory-standard square and are traceable to dependable standards.
Optical line methods
Optical line measurement methods include a sighting telescope with target and a laser and target combination. The telescope with target method [image] is a traditional, established and effective laboratory technique but it requires diligent calibration and operation – and optimal light conditions, which are not always available.
Laser measurement
Laser measurement devices use a Go/No Go target circle for a given pipe length and project specification. They are more robust than sighting telescopes and are easier to use, leading to fewer operation errors.
Other methods
There are various other methods for measuring pipes available, such as protractors, pipe wraps and rotating work-pieces. All of these methods come with their own limitations, difficulties in use and accuracy issues.
Choosing the best measurement method
When choosing the right measurement method for your project you should consider the following:
How accurate is the equipment?
How easy is it to use?
What common human errors are associated with it?
What is the measurement speed?
What is the results storage capacity?
Is it traceable to national/international standards?
How frequently is it checked and verified?
How suitable is it for the intended application?
Difficult to measure
Measuring a pipe’s end squareness accurately is notoriously difficult. At OMS we have found that even some of our clients were using squares bought from hardware stores, without calibration or any means of assessing accuracy, to attempt to measure end squareness because there has traditionally been a lack of effective devices available.
If you are interested in any of our tools or measurement methods please get in touch here.
Find this article useful? Sign up for more here!
Updated 29.03.2023
[5 minute read]


